Back
Pod reorganisation in a structured rugby attack

Rugby Pod Rotation: How the 1-3-3-1 Maintains Its Attacking Shape

1-3-3-1 rugby attacking system

Keep the Attacking Shape Alive After Every Breakdown

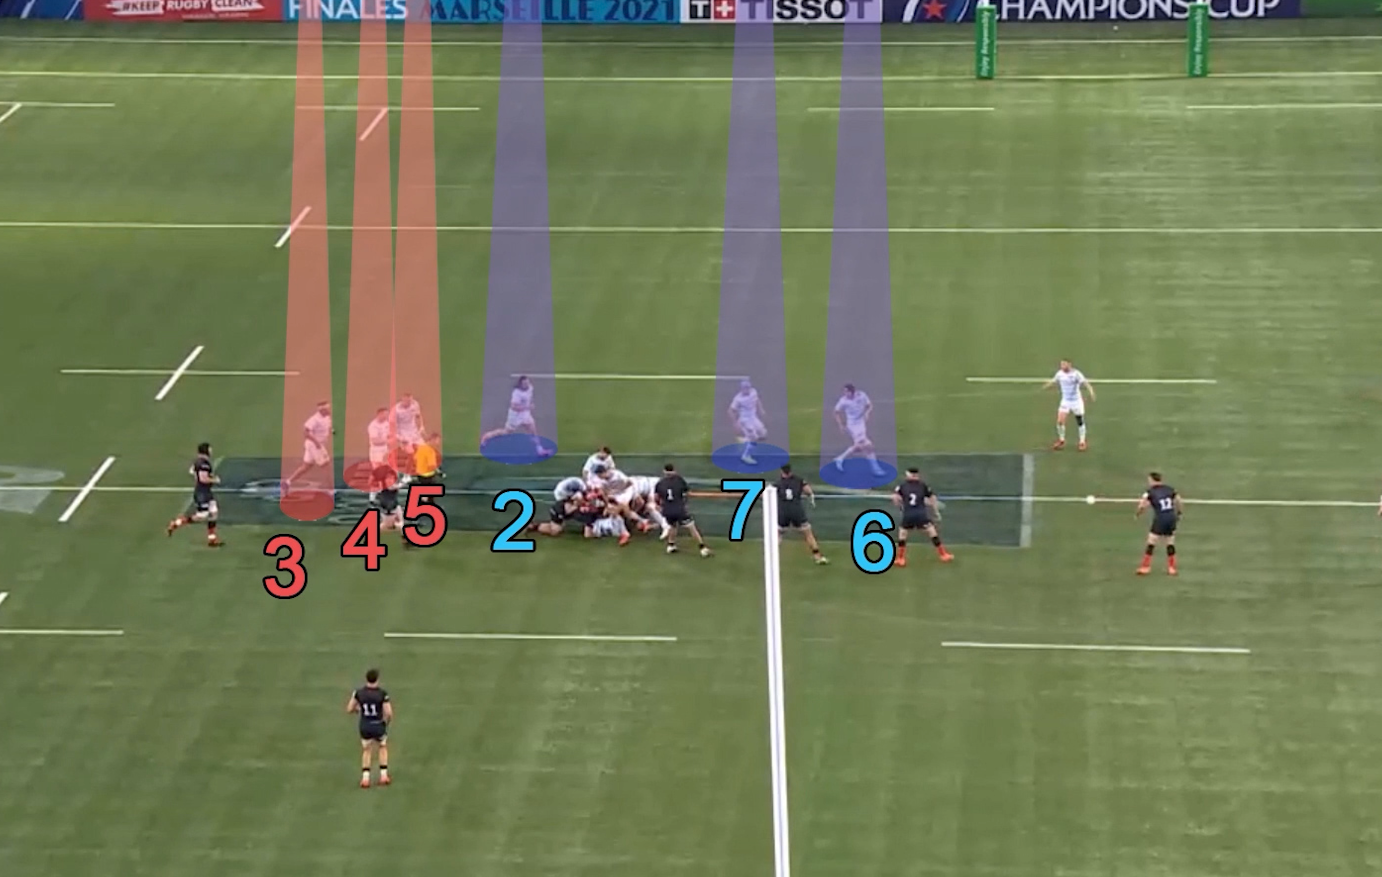
Rugby pod rotation is the process that allows a 1-3-3-1 attacking shape to survive after multiple rucks, line breaks and changes in the direction of play. The objective is not for every forward to follow the ball. It is to maintain width, preserve several attacking threats and reduce unnecessary movement.

This guide gives rugby coaches a practical framework for teaching rotation, reloading and folding through progressive training exercises. For the wider tactical context, begin with our guide to rugby attacking systems, pods and shape and our explanation of 1-3-3-1 rugby pod distribution .

Maintain Attacking Width

Keep credible options available across the full width of the pitch.

Reduce Wasted Running

Help forwards reorganise efficiently instead of constantly chasing the ball.

Develop Shared Decisions

Give players common references they can use when the original shape breaks down.

Understanding forward movement

What Is Pod Rotation in Rugby?

Pod rotation describes how forwards reorganise after each breakdown to maintain an effective 1-3-3-1 rugby attacking shape across several phases.

The initial 1-3-3-1 structure places two central pods of three forwards between two players occupying the wide channels. Once play begins, those starting positions cannot remain fixed.

Carries, rucks, line breaks and changes in direction continually alter the attacking picture. Players must decide whether to move into another area, recover their depth and width or work around the breakdown to support the next phase.

Effective rugby pod rotation is therefore a decision-making process. Players read the position of the ball, the other pod, the available backs and the defensive line before moving. Coaches can first establish the starting positions with this guide to 1-3-3-1 rugby pod distribution .
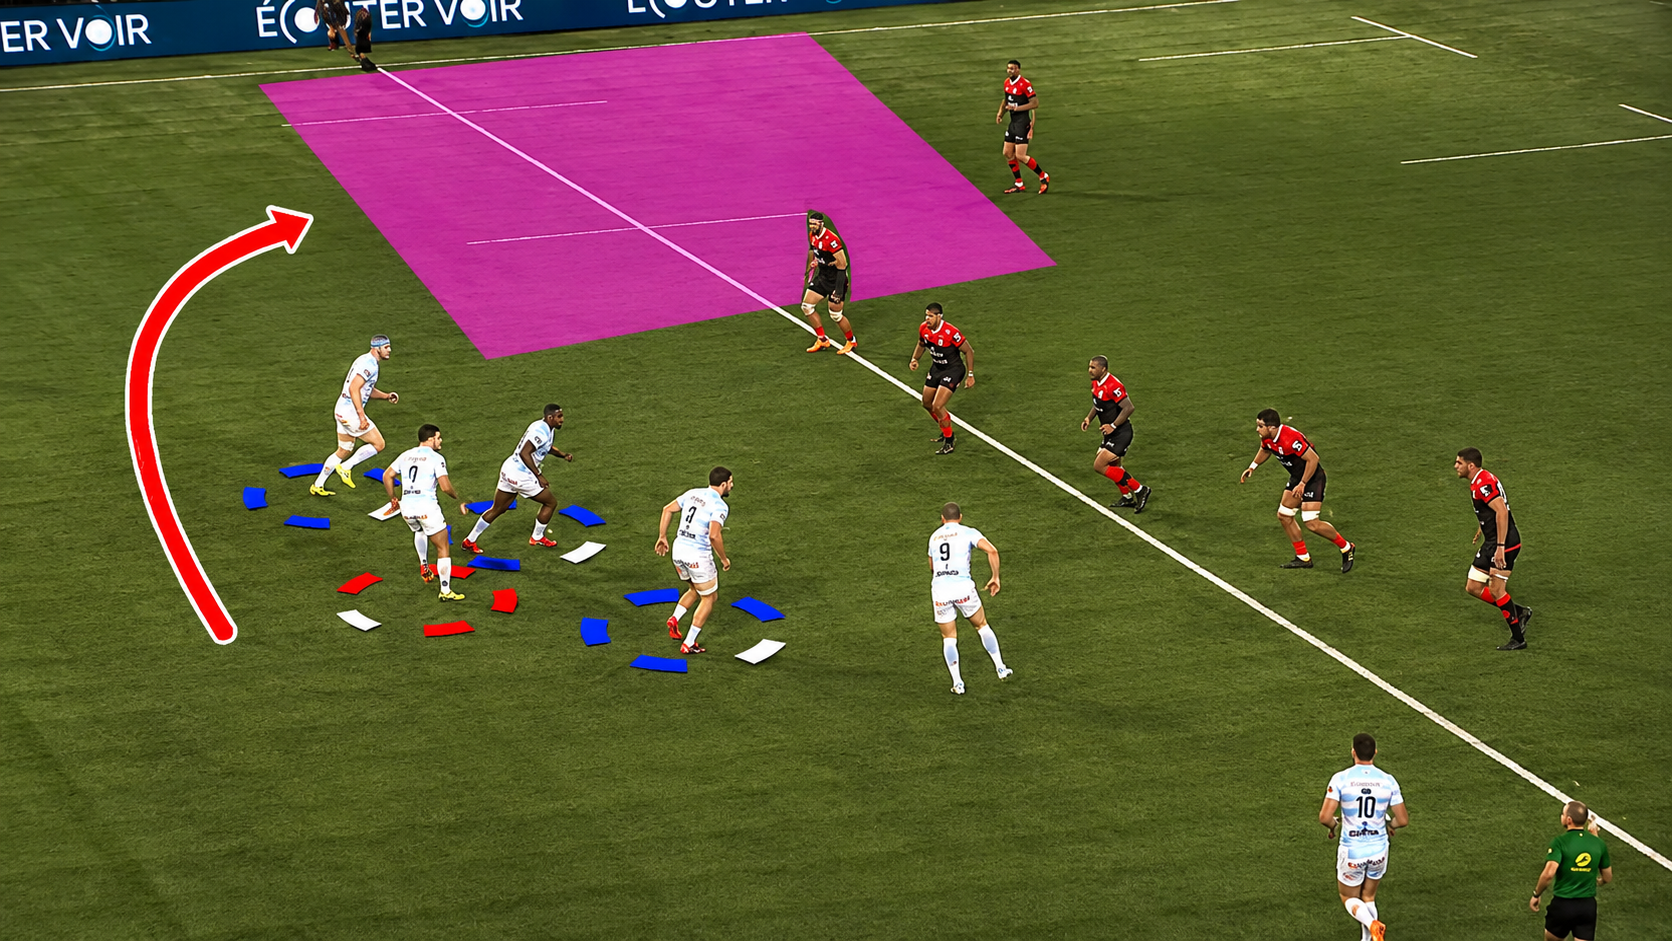
The essential coaching principle Preserve the balance of the overall attacking shape rather than fixed pod membership. Every forward does not need to follow the ball after every ruck.
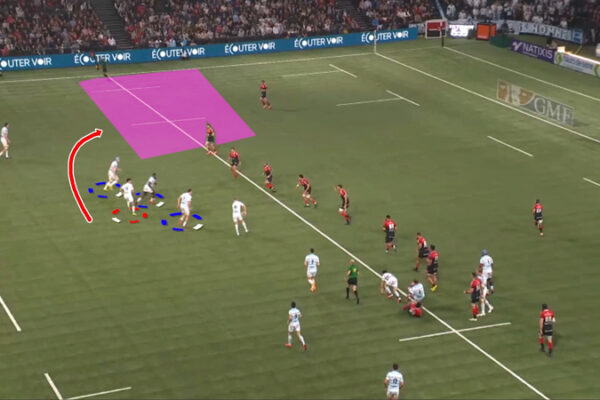
Rugby pod rotation showing forwards reorganising into space in a 1-3-3-1 attacking system
A forward pod reorganises towards the available space while the team retains width and several attacking options.

Why Pod Rotation Matters in the 1-3-3-1

Benefit 01

Preserve Attacking Width

Balanced forward distribution prevents both pods gathering near the same breakdown and retains a genuine threat on both sides of the pitch.

Benefit 02

Reduce Unnecessary Running

Efficient realignment allows forwards to remain useful without repeatedly travelling from one side of the field to the other.

Benefit 03

Maintain Several Options

Connected pods give the first receiver carrying, tip-on and pull-back options while forcing the defence to protect the full width.

What should the rugby coach observe?

Do not judge the rugby training exercise only by whether the attack crosses the gain line. Check whether width remains available, both forward groups stay balanced and players communicate before moving.

Make the 1-3-3-1 Work

Stop relying on rigid patterns that disappear under pressure. Learn how to build, teach and adapt a complete 1-3-3-1 attacking framework your players can understand, execute and evolve on the field.

Shared rugby coaching language

Rotation, Reloading and Folding: What Is the Difference?

These three movements can look similar from the touchline, but they solve different attacking problems. Rugby coaches must use consistent language so players understand why they are moving—not simply where they must run.

Movement 01

Rotate

Move across the pitch to become part of the attacking structure in another area.

When it may be useful

Rotation can help rebalance the attack when one side lacks a forward pod or when the direction of play has changed significantly.

Coach’s cue: “Where is the missing attacking threat?”
Movement 02

Reload

Recover depth, width and connection while remaining in the same general area.

When it may be useful

Reloading is often more efficient when the attack already has enough players beyond the ball or when travelling across would remove width elsewhere.

Coach’s cue: “Can you become useful again without crossing the pitch?”
Movement 03

Fold

Work around the breakdown in the direction of play to support the next phase.

When it may be useful

Folding can support quick possession when the attack has momentum and needs more players available immediately beyond the ball.

Coach’s cue: “Does the next phase need you now?”
Movement Primary objective Main coaching risk
Rotate Rebalance the attacking shape in another area. Travelling unnecessarily and leaving the original area underloaded.
Reload Recover depth and width within the current area. Remaining too flat or too close to the previous breakdown.
Fold Provide immediate support in the direction of play. Following the ball automatically and creating an imbalance elsewhere.

Three checks before moving

First protect possession. Then scan the position of the other pod and the backs. Finally, choose the movement that restores the attacking shape with the least unnecessary running. This decision-making habit should be repeated in every progressive rugby training drill.

Build a Smarter Ruck Defence

Build clear and effective defensive structures around the ruck. Learn how to organise the fold, assign roles, protect key spaces and keep your defensive line connected from phase to phase.

Simple visual references

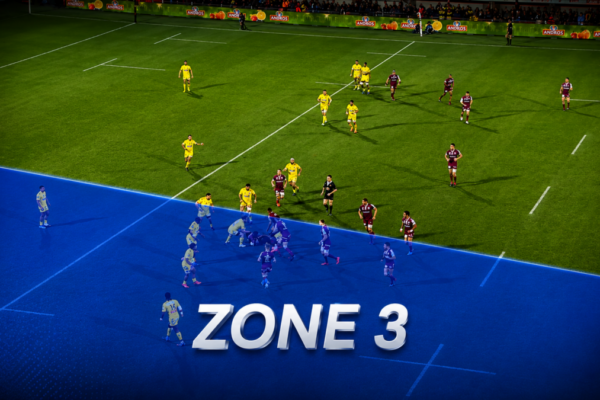
Using Field Zones to Guide Rugby Pod Movement

Dividing the width of the pitch into three broad areas gives players a simple reference for deciding whether to rotate, reload or remain available in their current part of the attacking shape.
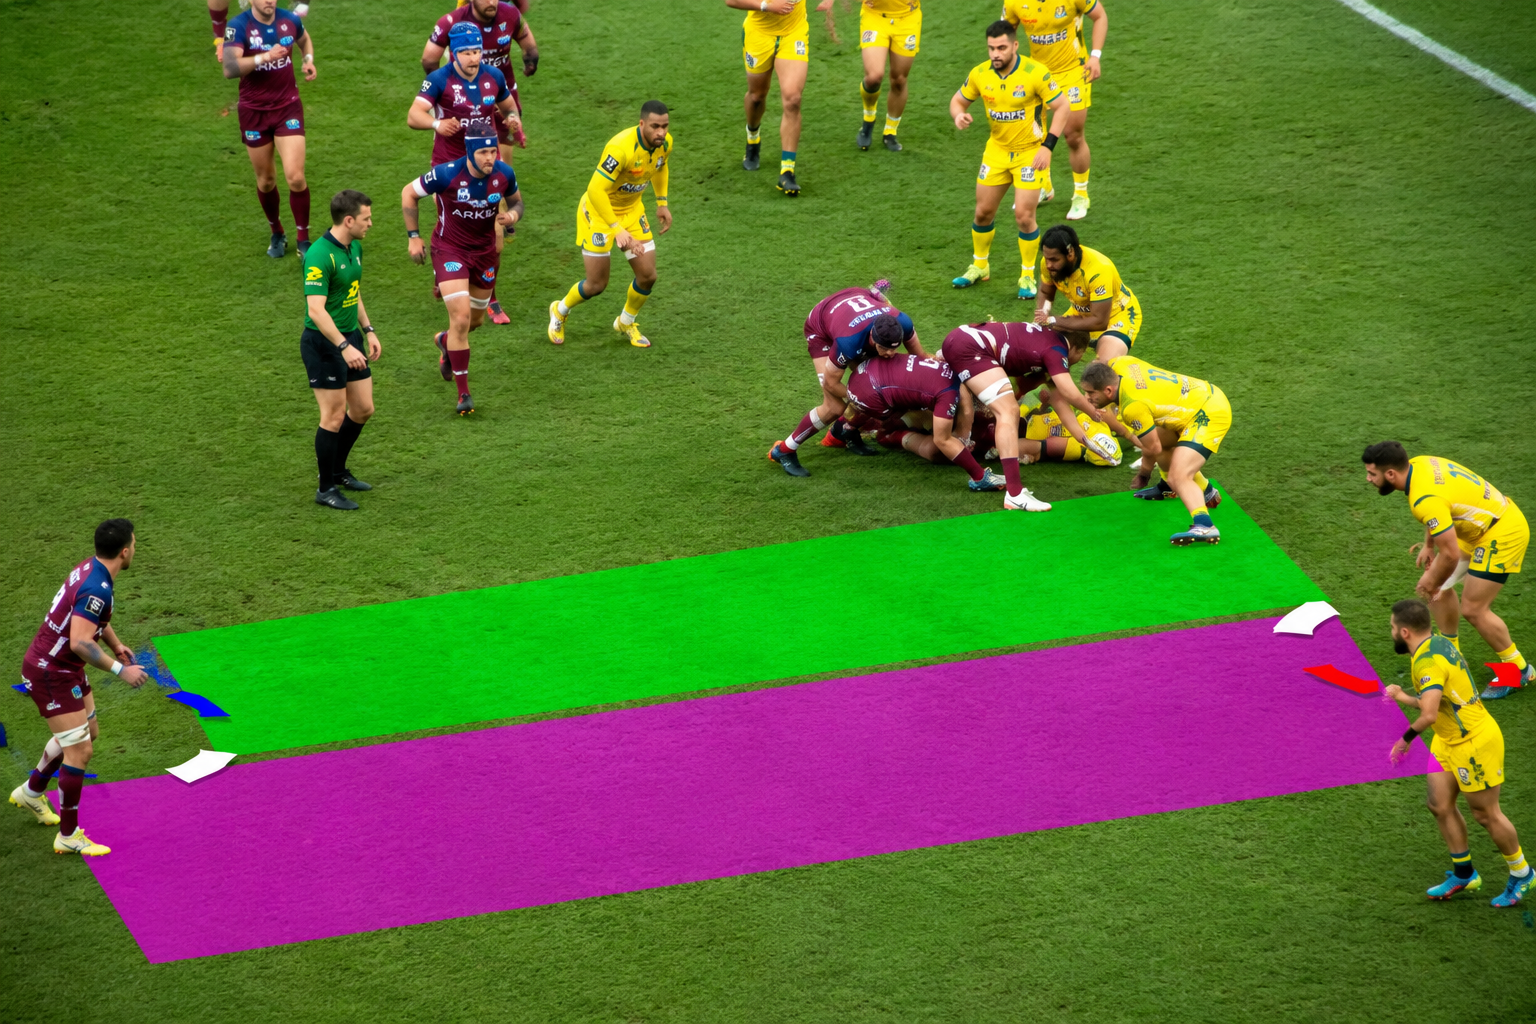
Rugby training image showing field zones used to coach forward pod rotation in a 1-3-3-1 attack
Coloured areas give forwards clear visual references without turning the 1-3-3-1 attacking system into a rigid running pattern.

The zones do not permanently belong to individual players or pods. Their purpose is to help the team recognise which part of the pitch already has enough attacking options and which area must remain occupied.

01

The Ball-Side Wide Area

Players closest to the direction of play provide immediate carrying, passing and breakdown support.

02

The Central Decision Area

Forwards must scan both sides before deciding whether to fold, reload or temporarily join another group.

03

The Far-Side Area

Retaining players away from the ball preserves width and provides an option if the attack changes direction.

Field zones are reference points—not running tracks

The rugby coach should use zones to simplify the first decisions, then gradually allow players to adapt. Possession, support and continuity always take priority when the attacking structure is temporarily disrupted.

Step 1 Mark three broad areas with cones.
Step 2 Establish the starting pod distribution.
Step 3 Change the position of each breakdown.
Step 4 Ask players to explain their movement.

Reading the complete attacking picture

Why the Middle of the Pitch Creates the Hardest Pod-Rotation Decisions

A breakdown near the touchline gives players a relatively clear reference. A central breakdown leaves both sides available, so forwards must scan the entire attacking shape before deciding where to move.

Automatically folding in the direction of the previous phase can place too many forwards on one side of the ruck. The team may appear well supported near the ball while losing its width and attacking threat on the opposite side.

A forward returning to their feet should not look only at the next breakdown. Their decision must account for the other pod, the backs, the wide forwards and the speed at which the attack can play again.

01

Where is the other forward pod?

02

How many attacking options are already available on each side?

03

Is the ball quick enough to continue in the same direction?

04

Where are the backs and wide forwards positioned?

05

Which area currently lacks a credible attacking threat?
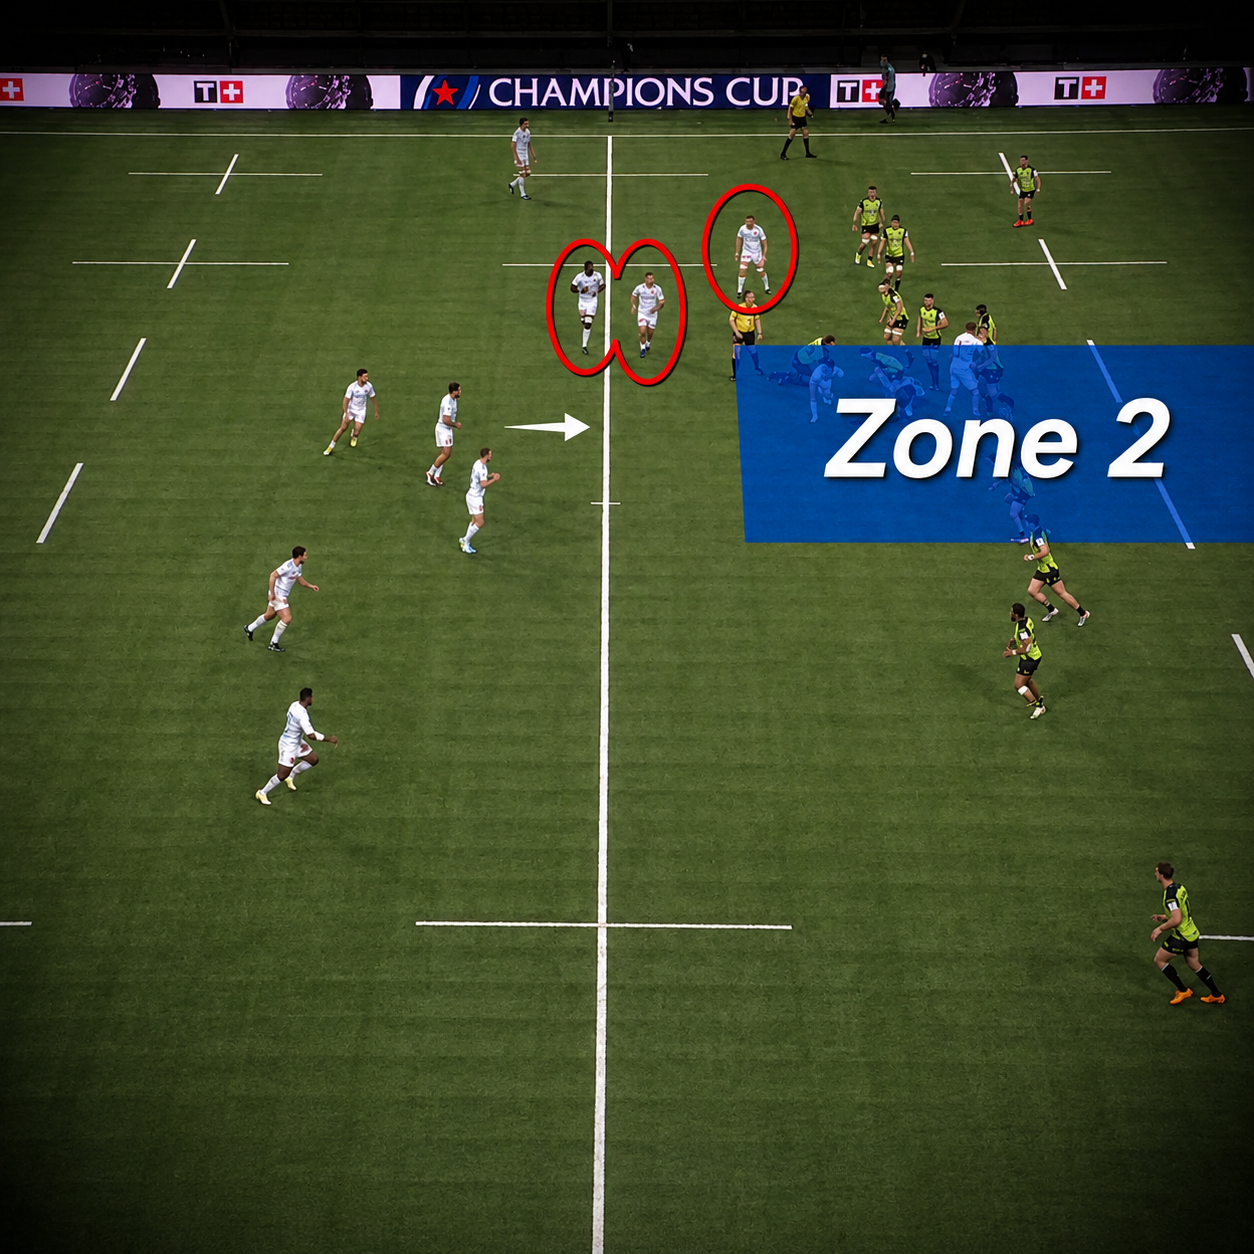
Central field zone used by rugby coaches to teach pod rotation decisions in a 1-3-3-1 attacking system
In the central area, players must assess both sides of the breakdown before choosing whether to fold, reload or rotate.
First Scan

Identify the ball, the other pod and the available attacking options.

Then Communicate

Share the decision before players begin moving in different directions.

Finally Move

Reorganise quickly while preserving width, depth and continuity.

A collective decision is easier to correct

A slightly imperfect decision made together is usually more effective than three forwards reading the situation differently. During rugby training, use realistic opposition and connected defensive pictures from these rugby defence drills and coaching principles to make the attacking decisions more representative of match play.


What Rugby Coaches and Directors Say

Here are a few testimonials from coaches and rugby directors who have taken our courses. Some coaches, particularly those working at higher levels, have asked not to be identified publicly.

A progressive coaching framework

How to Coach Pod Rotation Without Making the 1-3-3-1 Rigid

Rugby coaches should provide clear starting references before adding pressure and freedom. The objective is to develop shared decisions, not to recreate a perfect tactical diagram after every breakdown.

01

Establish a Shared Vocabulary

Every player must understand rotation, reloading and folding. Use the same language during walkthroughs, rugby training drills and match reviews.

02

Introduce Clear Field References

Begin with broad zones and an organised starting shape so players can see where the two forward pods and wide forwards should provide threats.

03

Coach the Scan Before the Movement

Ask players to identify the other pod, the available backs, the speed of possession and the defensive picture before they begin running.

04

Accept Temporary Disorganisation

Possession and continuity take priority after a line break or disrupted ruck. Once the immediate problem is solved, the team can rebuild its shape.
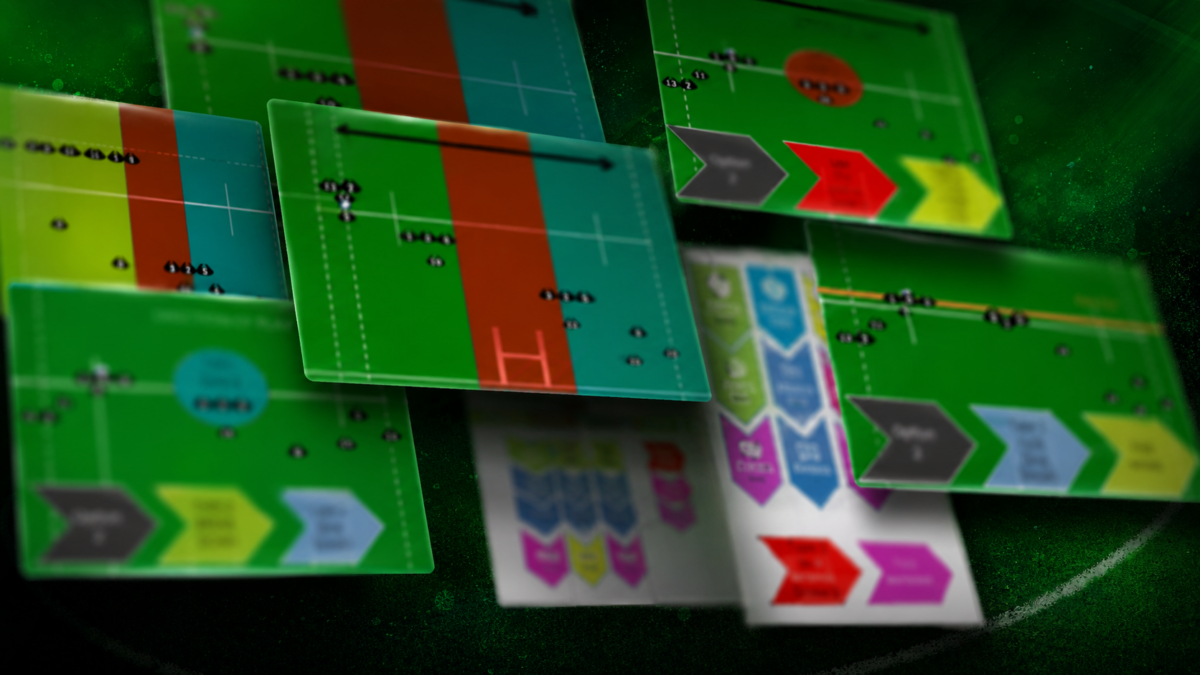
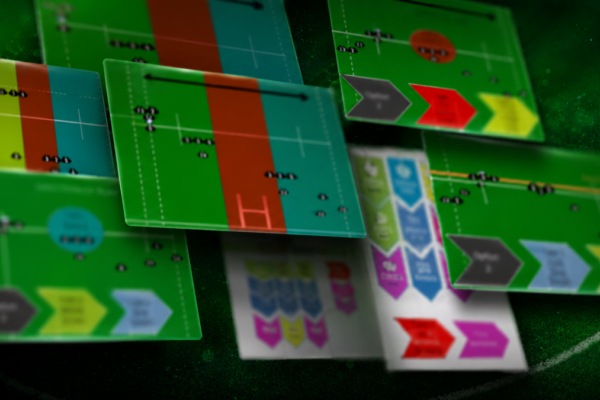
Rugby coaching diagrams used to teach pod rotation and the 1-3-3-1 attacking system
Tactical diagrams establish the starting references, but players must then apply those principles during realistic phase-play training.

Questions for the rugby coach

  • What information did the players see?
  • Why did the pod rotate rather than reload?
  • Was width preserved on the opposite side?
  • Did the players communicate before moving?
Early learning Pause and Correct

Stop play briefly to clarify positions, language and the information players missed.

Developing understanding Question the Players

Allow them to explain the decision before the coach provides the solution.

Game transfer Maintain Continuity

Let several phases continue before reviewing whether the attacking shape recovered.

Coach perception before conditioning

Pod rotation problems are not always caused by poor fitness. Players often run unnecessary distances because they have not identified the correct attacking picture. Improve their scan and communication before demanding more movement.

Progressive rugby training exercises

Four Rugby Pod Rotation Drills: Building the Starting References

Begin without defensive pressure so players can understand the movement and communication required to maintain the 1-3-3-1 attacking shape. These first two rugby coaching drills establish the foundation.
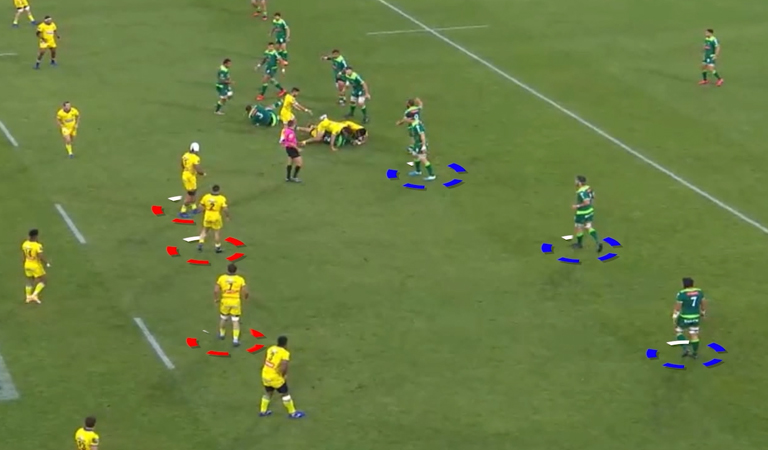
Two forward pods positioned across the pitch during a rugby pod rotation training exercise
Two connected forward groups must remain available instead of gathering around the same breakdown.
Rugby Drill 01

Three-Zone Pod Walkthrough

Establish the starting shape, shared vocabulary and basic movement references.

8 forwards Half-pitch width 8–10 minutes Unopposed

Organisation

Mark three broad field zones with cones. Position the two central pods and the two wide forwards, then simulate a breakdown in different areas of the pitch.

Player task

After each simulated ruck, players identify whether they should rotate, reload or fold. They must communicate the decision before moving.

Coaching points

  • Recover useful depth rather than standing flat beside the ruck.
  • Maintain a genuine attacking option on both sides.
  • Use the same movement vocabulary throughout the exercise.
Progression: remove some of the cones and ask players to recognise the zones from the pitch markings and position of the ball.
Rugby Drill 02

Wide-Channel Rotation and Reload

Prevent the far-side pod from automatically following the ball towards the edge.

8–10 players Three phases 10 minutes Low pressure

Organisation

Move the ball through two or three controlled phases towards a wide channel. A coach or scrum-half determines where each new breakdown is formed.

Player task

Players closest to the direction of play provide the immediate options. The opposite pod must remain connected and reload efficiently instead of travelling unnecessarily across the full width.

Coaching points

  • Keep width available if the attack changes direction.
  • Scan the number of players already positioned beyond the ball.
  • Communicate which pod becomes the next attacking reference.
Progression: allow the distributor to reverse the direction of play, forcing the pods to exchange their immediate attacking roles.

From controlled movement to game situations

Rugby Pod Rotation Drills 3 and 4: Decision-Making Under Pressure

Once the wide-channel principle is understood, the rugby training progression can introduce central breakdowns and situations in which the original attacking shape has been disrupted.

Rugby Drill 03

Central-Breakdown Decision Exercise

Develop the ability to assess both sides of a central ruck before choosing whether to fold, reload or remain available.

Starting situation

Place the breakdown in the central area of the pitch. The forwards must assess how many forwards and backs are already available on each side before moving.

Questions used by the coach

  • Where is the other pod?
  • How many attacking options already exist beyond the ball?
  • Which area of the pitch is currently underloaded?
  • What would happen if the whole pod followed the ball?

Coaching focus

Allow players to explain the information they identified and the reason for their movement. The decision should be collective rather than several forwards reacting independently.
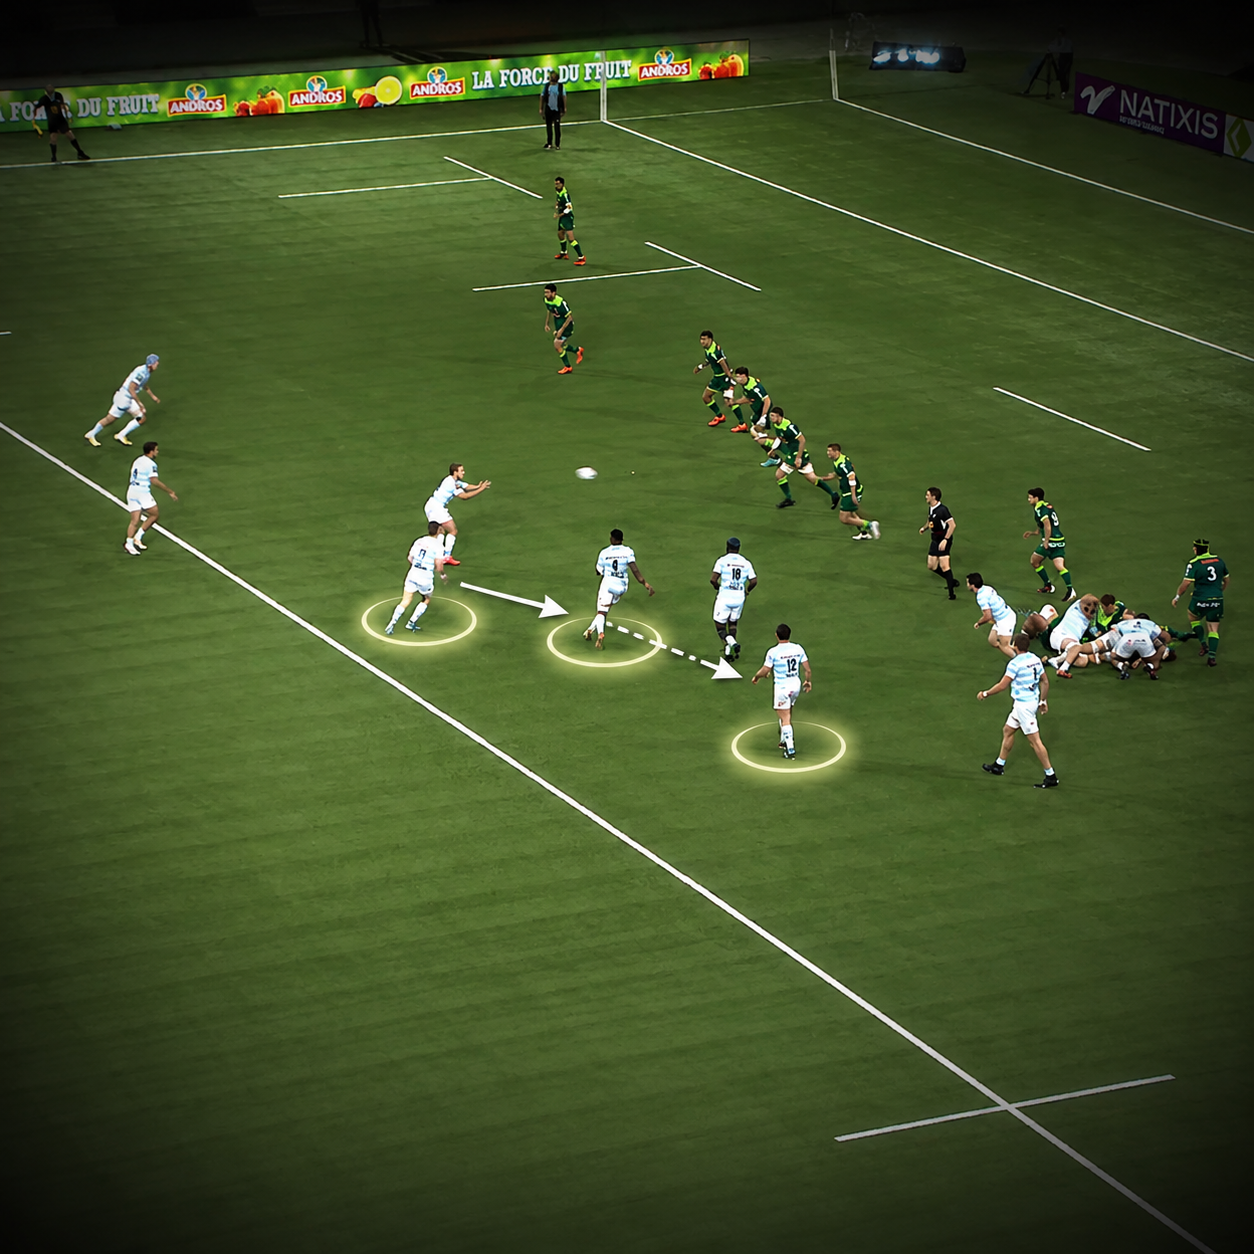
Rugby pod rotation exercise showing forwards reorganising after a central breakdown
A central breakdown requires players to scan both sides before selecting their next movement.
Forward pods reorganising around a breakdown during a multi-phase rugby training exercise
When the original shape is disrupted, the immediate problem must be managed before the forward pods gradually reconnect.
Rugby Drill 04

Rebuilding the Shape After Disrupted Play

Help players retain possession and progressively recover the attacking structure when a normal pod rotation is no longer possible.

Situations introduced by the coach

  • A line break changes the position of the next breakdown.
  • A counter-attack begins without the normal starting distribution.
  • Slow possession gives the defence time to reorganise.
  • A player temporarily leaves the pod to support the breakdown.

Player priority

Players first deal with the immediate requirement to protect possession and maintain continuity. They then communicate and gradually rebuild two balanced forward groups during the following phases.

Coaching focus

The objective is not to recover the original diagram immediately. Observe whether the team identifies the urgent problem, reconnects and restores a credible attacking threat across the pitch.

Keep the progression faithful to match situations

Begin with controlled pictures, progress towards the central area, then add the unpredictable situations that already occur in rugby: line breaks, counter-attacks, slow ball and players being drawn into the breakdown.

What coaches see in real phase play

Four Pod-Rotation Mistakes That Break the Attacking Shape

Most problems with forward pod rotation are not caused by a lack of effort. In fact, the forwards are often working extremely hard. The problem is that their movement does not always make the next phase easier to play.

Mistake 01

Everyone follows the ball

From the sideline, this can look like excellent work rate. Several forwards get around the corner quickly and appear ready for the next carry.

The problem becomes visible one phase later: both pods are now in the same area and the opposite side of the pitch no longer presents a credible threat.

What to coach instead

Ask the far-side forwards whether moving closer to the ball genuinely adds an option, or whether reloading would make the overall shape stronger.

Mistake 02

The pod becomes more important than possession

Players sometimes hesitate to support a difficult breakdown because leaving their position would temporarily disrupt the forward pod.

That gets the priorities the wrong way around. The attacking structure only matters while the team still has the ball.

What to coach instead

Deal with the immediate threat to possession first. A pod can operate with one player missing for a phase and reconnect once continuity is secure.

Mistake 03

Three forwards make three different decisions

One player folds, another stays behind the ball and the third runs across to join the opposite pod. Individually, each decision may appear reasonable. Collectively, the group disappears.

What to coach instead

Encourage an early call and a shared response. A slightly imperfect collective decision is easier to correct than three disconnected movements.

Mistake 04

The coach demands a perfect diagram after every ruck

A line break, counter-attack or difficult breakdown will occasionally destroy the original 1-3-3-1 picture. Trying to restore every position immediately can create even more unnecessary movement.

What to coach instead

Accept temporary disorder. Maintain possession, keep the attack moving and allow the two forward groups to reform across the following phases.

The best rotation is not necessarily the longest run. It is the movement that keeps the team dangerous on the next phase.

A simple review for the rugby coach

After a phase-play exercise, ask three questions: did we keep the ball, did we retain attacking threats on both sides, and did the players make the decision together? Those answers usually reveal more than the final position of each forward.

Questions rugby coaches often ask

Frequently Asked Questions About Rugby Pod Rotation

Pod rotation becomes much easier to coach once players stop looking for one automatic answer after every breakdown.

Should the forward pods always move in the direction of play?

No. That is one of the main misunderstandings around pod rotation. Continuing in the same direction may make sense when the ball is quick and the attack still has space to use. Once the play reaches a wide area, or enough players are already beyond the ball, reloading can be far more useful than following it.

How does the speed of the ball affect pod movement?

Quick possession gives the attack a chance to move before the defensive line has fully reorganised. Slow ball changes the picture. The defence has time to fold, so the best attacking option may be to reload and play back against that movement rather than continue automatically in the same direction.

What happens when players make different rotation decisions?

The structure will not be perfect after every phase. If one forward becomes disconnected, that player can temporarily work with another group. The priority is to communicate, reconnect and rebuild two balanced attacking options over the following phases. Pod membership does not need to remain fixed.

Can amateur rugby teams use pod rotation?

Yes, provided the system is introduced progressively. Amateur players do not need dozens of fixed patterns. They need a small number of shared references they can recognise when tired or under pressure. Coaches deciding whether the 1-3-3-1 suits their squad can also read our guide to rugby attacking systems, forward pods and attacking shape .

Pod Rotation Is a Shared Decision, Not a Fitness Test

A forward can cover a huge distance and still make the attacking shape worse. Another player may move only a few metres, recover their depth and give the team exactly the option it needs.

That is why effective pod rotation depends on what players see, how early they communicate and whether the movement keeps the whole team connected. The 1-3-3-1 should help players solve problems. It should never trap them inside a diagram.